Monday, March 25, 2019

Rails and Ties

Work continues on Marceline Shops. More track is being laid and we tackled the lead to the turntable, turntable pit, and the turntable crank and equipment. The turntable to reached off the lead track via what turned into a "wye" stub switch. Most of the switches around the roundhouse and yard in Marceline are planed to be stubs.

Stub switches where very common prior to 1870. Rather then the conventional set of tapered point blade, on a stub switch both the movable rails and the ends of the rails of the diverging routes have their ends cut off square. The rails leading up to a stub switch are not secured to the cross-ties for several feet, and the switch mechanism aligns the movable rails with the rails of one of the diverging routes. This is the part that actually moves, and the source of the slang "bend the iron" for throwing a switch, because you literally are bending the iron. Stub switches were more common in the very early days of railroads and could be found in 19th century yards and branch-lines.


Easy to lay and easy to operate, their disadvantage comes in that rail alignment across the gap is not positively enforced and they require some substantial flexibility in the rails (meaning lighter rails), or an extra joint at which they hinge. Therefore, these switches cannot be traversed at high speed or by heavy traffic and so are not suitable for main line use. A further disadvantage is that a stub switch being approached from the diverging route that is not connected by the points would result in a derailment. Stub switches are also almost impossible to throw in hot weather, when the rails expand and press against each other. It also doesn't take much in the way of misadjustment to put the whole train on the ground.

One advantage to stub switches is that they work better in the snow and ice. The sideways action of the point rails pushes snow to the side, instead of packing the snow between the points and the rail in a more modern design. They are also less prone to operator error than bladed switches, especially in more complex arrangements such as double slip and crossovers, in the sense that the routing was more obvious just by looking at the rails.

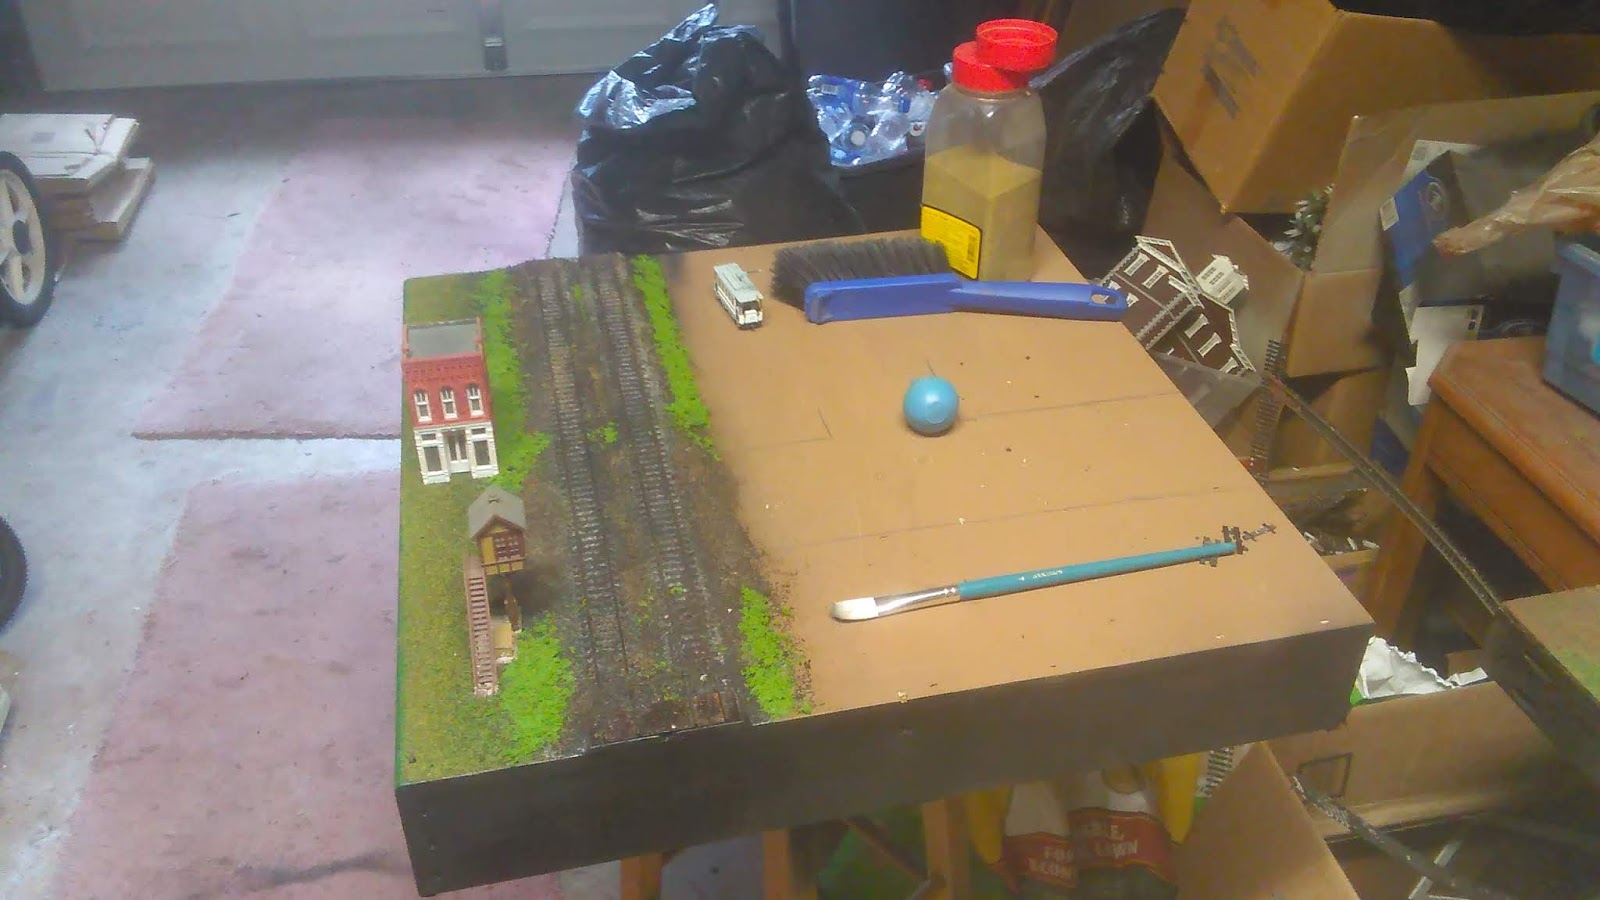
Ties, weathered and in place.
Construction of the switch is pretty strait forward. The track center-line is first established. Both main lead, and diverging. The ties are then cut to length and laid out by hand and measured by eye. Like the rest of the track-work, once the ties are in place, they are weathered using Micro-mark's Age-It.

The rail is cut using a Dremel cutting wheel. The best way to establish the geometry when hand-laying, is to lay the common rail first. We chose the right side common rail, as this was the main lead, while the left was to be the turntable lead. We didn't worry about the switch stubs just yet. Preferring to get the rails in place first. Once the common rail was laid down, the other rails could be gauged appropriately against it. The frog was made simply by cutting the rails and filing them down to points. Once spiked together, the points where soldered into one rail. Using the cutting wheel, the frog was isolated for electrical conductivity.

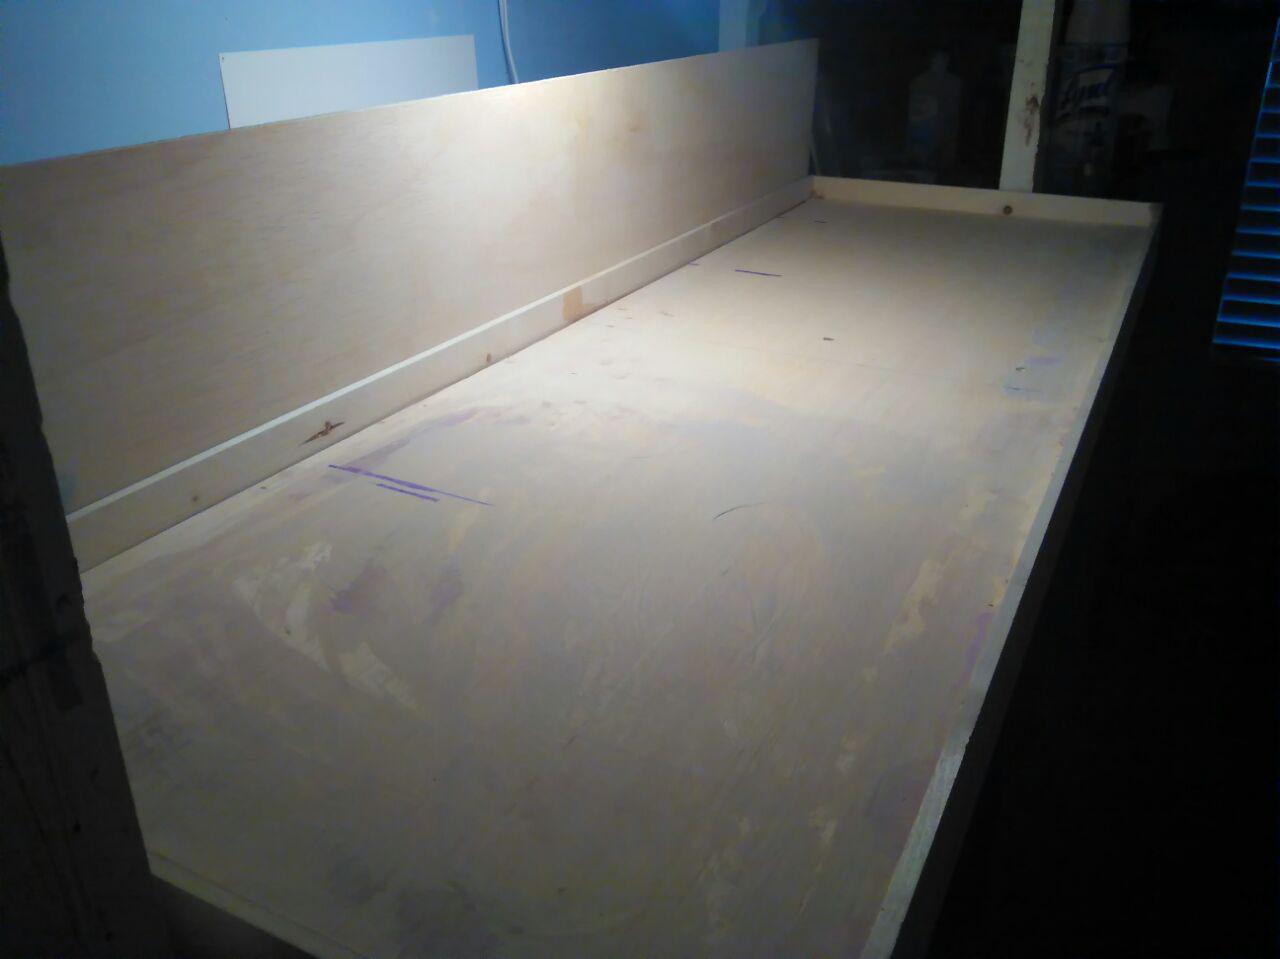
Almost ready for the stubs to be cut.
The final step, once all the rails where in place, was to cut the stub rails free. The ends of the solid rails where then soldered in place, and the stubs soldered to their throw-bar. A switchstand is then linked up to the throw-bar and anchored to the headblock tie. (The headblocks are the extra long ties that the very end of the movable points, be they stubs or blades, rest on. They also support the switchstand.) 

The switchstands I plan to use are all uprights with tall targets. The prototype for these are operated with a handle that is raised, moved, and dropped into a slot. The lever handle is slotted, and when the switch is set for either track, the slot fits over a staple projecting above the lever far enough to receive a padlock which locks the switch. Switchstands are Caboose Hobby up-rights. While they might be a bit over-scale, I've always had a love for switches that had working stands. It just feels more "railroady" to me to be able to throw a switch using the stand-lever. Over the course of my own railroading career, I've thrown countless, countless, switches of this sort. As well as the more ubiquitous ground throw with the weighted arm. But that's another story.


The next stage was the turntable, and turntable pit. I obtained an Atlas full deck turntable. The turntable, which is run via a handcrank located on the turntable frame, has a geneva movement that index locks table in exact position every time. Originally, I had thought to simply motorize the turntable crank and drop it in as a full-deck. Which, while commonly found in the north, where the full deck made sweeping snow out of a pit much easier, would be slightly out of place on my southern based layout. 

Upon seeing the turntable, some of my friends had other ideas. One of which, suggested that we yank the hand-crank and index system out completely and instead attempt to mount a motor from an MTH locomotive as well as a gearbox under the baseboard and turn the table mechanically. We removed the turntable deck, and mounted it higher in the pit to allow room for the table to turn. A rail and support ties where added in a ring shape in the pit and a hole was cut in the foam to allow the turntable to sit flush with the approach rails. 

One problem we've encountered with this arrangement is that we can't seem to find a rear reduction that will spin the table at a realistic speed. The MTH gearbox seems to want to twirl locomotives like a record player. Some tinkering will have to be done. 


More to come!

Saturday, March 23, 2019

Locomotives Of The W&A


 THE TEXAS


This is my fifth (and hopefully final) incarnation of the W&A RR's #49, the Texas. The champion of the Great Locomotive Chase of 1862. Here, the locomotive sits after a rebuilt in 1889, with the addition of injectors, and an air compressor, but painted in a more subdued version of the chocolate brown paint scheme she wore during the war.

This incarnation is built atop one of the New Tool 4-4-0s produced by Bachmenn. It started out life as a stock “Texas”, the running boards where cut short and the stack and pilot beam where cut off. A brass horizontal strap pilot beam was applied, and a new stack was built from a Mantua “General” with a new cap from the top of a Bachmenn On30 Porter stack. Piping was made out of brass stock, and an air-compressor from Keystone was added to the fireman's side. The Texas is equipped with crosshead pumps on the engineer's side, and an injector on the fireman's. Like most of my 4-4-0s, the Texas is “barefoot”, having air-brakes only on the tender. A new coal load made from crushed coal finished the model. The nameplates are decals applied atop styrine sheet, then cut to size and applied to the boiler.


The locomotive has an advanced logic control that can be manipulated in programming mode to simulate the weight of a train under different conditions. Think of it like a “hyper” momentum. Rather then “dumb” momentum which just acts like a giant resister, the hyper momentum can be controlled via manipulation of the locomotive's controls. IE: applying the brakes on an air-braked train will stop the train faster then just shutting the throttle and letting her coast. You can also manipulate the Johnson bar cut off to both improve performance while running, as well as brake. For example, you can stop the locomotive by closing the throttle, swinging the Johnson bar into reverse, opening the cylinder cocks, and cracking the throttle until there is enough back pressure to bring the locomotive to a stop. All with accompanying sound effects.

The goal was to emulate a 19th century steam locomotive in fine detail. This is not a locomotive for the weak. You're not going to just turn the dial and it goes. Running this locomotive is like running a full size steam locomotive. You actually have to operate it.


THE DISPATCH  

The Dispatch is a locomotive that has been with me in one form or another since I graduated high school. Whenever I doodled a locomotive or write about one, it would inevitably be a 4-4-0 with the number 97. I'm not sure if she was numbered after the 97 of folklore, or just happenstance. The truth is probably somewhere in-between. The Dispatch appeared in a number of fictional stories I wrote, as well as a few online articles.

This incarnation is built atop one of the New Tool 4-4-0s produced by Bachmenn. It started out life as a stock “York”, and is the most stock of the 4-4-0 bashes I have done. I swapped cabs and tenders with a donor “Texas” model, re-lettered her, and cut off the stack and pilot beam.

A brass horizontal strap pilot beam was applied, and a new stack was built from a Mantua “General” with a new cap from the top of a Bachmenn On30 Porter stack. Piping was made out of brass stock, and an air-compressor from Keystone was added to the fireman's side. Like most of my 4-4-0s, the Dispatch is “barefoot”, having air-brakes only on the tender. A new coal load made from crushed coal finished the model. The nameplates are decals applied atop styrine sheet, then cut to size and applied to the boiler.

The locomotive is DCC equipped and has the standard sound system as supplied by Bachmenn. Soon to be replaced by a Loksound ESU 4.0


THE NICOLE WATTERSON 

Everyone should have at least one good switch locomotive. Some old yard goat that's been demoted from mainline service, or a little saddletanker who spends her life in the yard.

The Nicole Watterson is intended to represent an older locomotive that was rebuilt into a yard engine. The model started out life as a Bachmann saddletank 0-6-0. It was stripped to the frame, and only the chassis and the saddetank was retained. She carries a boiler from a New Tool 4-4-0, the stack from the Old Tool 4-4-0 (The one part of the NTs that I dislike is the fact that they went from having a mesh metal screen in the stacks to just a plastic bubble) with domes and detail parts from Keystone.

The cab is an MDC cab, and the bunker was cut from an MDC tender. Piping was made out of brass stock, and an air-compressor from Keystone was added to the fireman's side.

The loco is equipped with a LokSound ESU V0.4 decoder.


THE PALLA 
 
Just put the final touches on this one. Other then the addition of a few small details later on, such as a rack of deer antlers on the lamp, she is more or less finished.


This incarnation is built atop one of the New Tool 4-4-0s produced by Bachmenn. It started out life as a stock “AT&SF loco”. I swapped tender shells with a donor “York” model, re-lettered her, and cut off the stack and old pilot beam. A new pilot beam was built from styrene and balsa wood, with a brass vertical slate pilot attached to the new beam. The domes where replaced with Baldwin domes from a set of spares for the Bachmenn Richmond 4-4-0. New piping made from brass stock, with the new check valves and cross-head pumps obtained from Kemtron. Brake-piping was made out of brass stock, and an air-compressor from Keystone was added to the fireman's side.

The cab was repainted to a color that was more representative of polished wood, and an engineer and fireman figure from P.K.'s 1800's range placed in the cab. A new whistle and new stack and a new coal load made from crushed coal rounded out this build completing the conversion to a coal burner. Like all my 4-4-0's she has a set of switchmen steps on the rear of the tender. The nameplates are decals applied atop styrine sheet, then cut to size and applied to the boiler. Like most of my 4-4-0s, the Palla is “barefoot”, having air-brakes only on the tender.


The locomotive is DCC equipped and has the standard sound system as supplied by Bachmenn, with the “Crosby” whistle activated. 


THE SCAMP

The Scamp was one of my first bashes. Built from a high boiler Bachmann 4-6-0, I wanted a high driver ten wheeler evocative of the mid to late 1890s. The B-mann offering was pretty close, but was a bit too modern. I backdated the locomotive by removing a few appliances such as the dynamo and removing the Walsherts valve gear to make the locomotive have inside Stevenson. I disliked the tender the model came with and unable to find a suitable replacement, I ended up making my own. 
The tender tank is from a tyco 4-6-0, while the frame is one of the smaller tender frames supplied by B-mann.

The locomotive is completed with brass boiler bands, a crisp all black paint scheme, and a switchmen's pilot as she mostly finds herself in priority freight service. A new coal load made from crushed coal finished the model. She carries a Tsunami “Medium steam” sound decoder, and is one of my more reliable runners. 


Grizzly Flats

One of my prior model railroad projects was a NMRA module intended for use with North Georgia Modurail Club, a local model railroad group that I currently am a member of. Modular model railroading allows you the opportunity to build and own a small part of a larger layout, called a module. When combined with other member's modules you help create a much larger, complete model railroad, limited only by the space to contain it! Being a younger lad who has limited space for the hobby, modular model railroading was, and still is, very attractive. (It one of the reasons my own W&A is planned as a modular style layout.)

Members are encouraged to build sectional parts of a layout, known as modules, according to the club standards, these often are straight sections, usually between 4 and 8 feet long. At train shows, meets, and other events, we assemble these modules into a single layout. My personal module is a 2 by 4 foot square, with two mainline tracks. I decided to stick with my 19th century theme, so as to incorporate the module into a future layout, and started planning.

Thus, the town of Grizzly Flats Georgia was born. Named and inspired by the Grizzly Flats Railroad of Disney Animator, Ward Kimball. The story of the Grizzly Flats Railroad began in 1938, in the backyard of the Kimball’s San Gabriel, California orange grove. Ward, an animator for the Walt Disney Studios and part-time railroad hobbyist, decided to purchase several pieces of soon to be retired 3 foot guage railroad equipment, including a nice, vintage Mogul-type steam locomotive, numbered 2 and once named Sidney Dillon, which had operated in the Nevada desert since 1881. The rest is history.

Inspired by the history of the real GFRR, My W&A version was built over the course of a year, and includes several kit-bashed buildings, as well as plenty of small details. I'm a big believer in not wasting one inch of space on a layout, and the module is no exception. All of the structures where kitbashed or scratch built. Some are DPM kit fronts with cardstock sides and roofs, while others, such as the Kimball House are built from bass and balsa woods.


Somewhere in the fields of Georgia near the border with Tennessee sits the little railroad town of Grizzly Flats. Situated on the main line of the Western & Atlantic, it may be small in size but it's large in character. The town of Grizzly Flats first showed up on the map in the 1820s. No one is quite sure how it got the name. Although rumor has it that the site was first named by Walter and Roy Deznei, who first settled in the area with a coal mine

By the 1890s Grizzly Flats is a thriving little mountain town. Situated on a crossroads between the north to south Western & Atlantic railroad, and the east to west Stagecoach line.


Started and run by Mr. & Mrs. Kimball, the Kimball house is the heart of the town of Grizzly Flats, where the local folk come to play checkers, cards, and chat. One of the better places in town to get a room, guests must share bathing facilities and meals are scheduled so that guests and townsfolk eat together with the family at a large dining-room table. Mrs. Kimball cooks sumptuous meals on a wood-burning stove, and her specialty is hot chicken n' dumplings. Situated directly across from the depot, it's a short walk for travelers interested in a warm meal and a comfortable bed. It's also the local stage depot for those making a connection with a stagecoach. When market day comes, the Kimball House hosts several auctions for local produce in the backrooms.

The local constable finds his work cut out with a fellow who has had just a little too much.
 The Kimballs have a young daughter who is just starting to come of age. She has become as much a reason to visit the Kimball as the food. In fact, some would say she is rather boy crazy, and despite her mother's wishes can often be found entertaining young railroad men and stage travelers. 

The Kimball House was built from a wood kit. It's one of the few wood structures on the module, and is the centerpiece of the model. 


The center of the town is undoubtedly the little depot. This little whistle stop always seems to be busy. Even if a train is not due to stop for a day or two. Mr. Kimball, the agent, is always up to date on news coming in by telegraph, and enjoys the company. Entertaining visitors with his blend of humor and a game of chess or cards between his work. His bespectacled face can usually be seen in the operator's bay window upon the rival of trains. The depot has one room, with a railing separating the office from the tiny waiting section. A stove keeps the place warm in the chill of winter while the big windows and high roof encourage the cool breeze of summer.
Whenever a train stops in town, it's a cause for gathering. Passenger trains bring the town out, with baggage, freight, and mail crowding the little platform. Grizzly Flats is the biggest town in this neck of the woods and the only depot that the passenger train is scheduled to stop, so the platform is often full of local freight, mail, and express. The water tank is the last one before reaching Tweed Hill, so freight trains will often stop here to replenish their tanks. Having a telegraphy set, the depot will also issue train orders.

Sheriff Lom Trevors is a frequent visitor to the depot. He can be found on the platform upon the arrival of each passenger train, just to greet and check out those who are newly arriving into his town. 

The depot is a model of the original Grizzly Flats depot. The depot building was given to Ward by his boss, Walt Disney, and was originally used as a set piece for the 1949 Disney film So Dear to My Heart. Sadly, it was recently lost in the forest fires that have crippled California in the last year. My model started out life as a Walthers "Victoria Station", which is based on the Lehigh Valley Railroad's "Pottsville branch" depot. 

Moe about the original depot can be found here: History of the Grizzly Flats Depot 

My model was detailed with several handmade signs, and a new roof to match closer to Ward's depot. The shingles where made from manila envelopes, and glued strip by strip to cardstock panels that where cut to the size of each roof panel. The plastic shingles where sanded off, and the panels with the new shingles glued in place. Mullens and eves where added and the whole lot was painted.


 A cast metal train order signal completed the model. The platform was built from strip wood and matchsticks, and painted. I use a trick called "Scratch back" to do weathering on wood platforms and sidewalks, where I paint the surface with a dark color, then run fine sandpaper along the wood in the direction of the grain. The result is an appearance of lots of ware a tare on a wood surface. Like a lot of weathering tricks, there is no right or wrong way to do it. You just keep at it until you are satisfied. The platform is filled with figures from Presser KG and lots of little details such as mail-sacks, milk-jugs, and other LcL freight.


The town water-tank is built entirely from matchsticks, with a spout reused from a broken Walther's wooden watertank. The tank itself is built by gluing matchsticks around the circumference of an old testers spray-paint can lid. The spout can be lowered and raised and is counterweighted.

The streets of Grizzly Flats are rather busy. With the local stage having just arrived while a freight wagon moves towards the railroad crossing that splits the town. Likewise, just behind the depot, Ol. Doc Papper Jr. the local moonshiner and medicine man, has brought his wagon into town and is proceeding to peddle his wares to the locals.

Doc Pappy Jr. is a homage to a character created by one of my close friends for a theatrical skit. This Tennessee moonshiner is always quick with a joke and has just what you need for whatever ailment that cripples you. It's said his whisky runs the gauntlet from apple-cider to battery acid. When he's not attempting to blind the local populace, his medicinal offers have been known to cure everything from food poisoning to impotence. Usually by causing the other.

Needless to say, there is never a dull moment when Doc Pappy Jr. in in town.

Next to the Kimball House stands the 101st Dalmatian. A local public house that is popular among travelers. Usually folks come to the pub for some liquid courage before setting out in the local stage, or preparing for a long train journey to either end of the line. Grizzly Flats, it seems, is almost equidistant from both ends of the W&A RR at Atlanta and Chattanooga. For those staying overnight who want something a little cheaper the the Kimball next door. (and easier to obtain some...horizontal comfort) the 101st has some rooms upstairs where for a few pennies on the hour one can find a soft bed or a warm pillow.


Across the street and over the railroad crossing sits Mr. W. Talbot's bookstore. Where one can find tombs and scrolls of all description. Mr. Talbot is a studious little fellow, who always seems to have his nose in a good book and has been known to daydream. Where he puts himself in the place of the main character of whatever story he is engaged in.

Across the corner from Talbot's is the town bank. The center of finance in Grizzle Flats is hasn't been robbed in over a week! Truly the safest of safekeepings.

Nearby also is the Grizzly Flats Gazette. The local newspaper.


Grizzly Flats regularly appears at local train-shows in the Atlanta Area. It's been a common feature of the North Georgia Modular Rail set ups, and hopefully will continue to entertain for years to come. Eventually, it will find it's place as a part of the bigger W&A RR Empire.

Marceline Shops


When designing Marceline Shops, I was limited to the available space of a bookshelf. There isn’t a lot of room for extra track work, so utilizing each track I have is an attractive option. Operating sessions will be set around the servicing of 6 locos a day and they will mostly be small. 4-4-0s and 2-6-0s are the mainstream with a rare 2-8-0 getting turned. With this type of load one track could handle all activities and another could be the supply track for sand and coal as well as the ash pit.

On the other track, space for the small tower discharge chute, a water crane, and the sand pipe can be added to the coal tower. If additional parking spaces are needed for engines ready to go a couple of open stall tracks could be added around the table or an engine pocket could be added in the yard. If you figure an hour to coal sand and water a locomotive you should have plenty of time to clear the track for the next loco. 
 When the sand is unloaded a gon can be parked to clean out the ash pit on the next track. Coal and sand could easily be delivered at the same time as there are spaces for two cars. In an emergency if designed properly locomotives could travel down the supply track if adequate clearances were maintained. The term turning a locomotive means more than just swapping ends, it means getting it ready for the road. That could mean 2 hours to maybe eight for ordinary things. More if the locomotive needs to go to the shop. 

 Benchwork for the module was constructed with 1/4' plywood built in the manner of a "tray", so that the one inch foam that would make up the layout terrain could sit snugly within. Underneath is space for wiring, as well as two support struts. The backdrop is attached with carriage bolts and wingnuts, so it could be removed for travel.

The main base of the layout it one inch foam, painted earth brown. Pretty early on I was talked into hand laying the track on Marceline Shops. One of the neat advantages to handlaying is that I was able to have working 19th century stub switches. A friend of mine who has more experience in these matters showed me how to build one of these suckers without resorting to crutches like Fast track jigs and whatnot. The end result is stunning.

I am using code 55 rail in order to represent the light rail found in 19th century track-work. The rail is spiked down to the ties, which are hand stained using Micro-Mark "Age-It"

About every fifth spike, the spike is dipped in glue to help hold it in both the foam, and the ties. There was a lot of learning, and of not for my modeling friend (who hopefully I can get to let me use his name on this blog) this would not have been achieved as smoothly.

One of the neat tricks used in this process was takeing the Atlas Tru-Track roadbed and using is as a jig to place ties. The road bed, minus the track, forms ready made curves and straits. The ties are simply dropped in place, and then a strip of tape is run across the top. Glue is run in a bead down the roadbed, and the ties are dropped atop the glue. Once the glue dries, the tape is pulled away.

I'm using Liquid nails for the majority of the layout. Although my friend recommend a silicone glue for some of the tighter areas as it allows for a more firmer grip between the spikes and the foam. The next step, once the mainline is in place and glued, is to dig the pit for the turntable. I am planning on retro-fitting an Atlas full-deck hand turntable.

We have an idea on how to motorize it, however that will be a topic for another post.


It Begins

   So....it begins.

    If asked to describe my layout, and the theme chosen for it, I would have to sum it up as a "Lady and the Tramp Model Railroad." 

It's been a solid 7 years since I've had a permanent model railroad. My life has sorta evened out to where I can start doing something again and with the new year, I decided that it was time to pull the trigger on my "dream" layout and build something for myself. I've built several layouts since I tore down the last one I've owned. The largest of which currently resides at a railroad museum. It was time to build my own vision, for myself.

Disney created meany classic films. Both fantastical, and endearing in their storytelling abilities. Some of which will find homages and nods within my world and the rails that spread across it.

But one stood out to me on a personal level. I have always been endeared to Lady and the Tramp since I was a small child.I had always been a fan of the Victorian and Edwardian era. Their familiar world and loving family first drawing me in as an innocent escape from reality. A love story that is both beautiful and complex set against a looking glass of nostalgia into a period of American history that is no more. Had they been non-fictional, Lady and Tramp themselves would have long since passed into history. Along with their world. 

This is an attempt to put a little history into that world. I have pulled myself back from 1909, the original time frame of the franchise, to set it among my 19th century railroad vision. ( As well as other alterations in order to tell the story I wish to tell.) But otherwise, the style, color pallet, and general atmosphere is intended to replicate the classic Disney film in model form.


Planning began around summer of last year, and I started working on collecting the material and coming up with a budget to start. The first module, titled "Marceline Shops" will be a 4x1 1/2 shelf style layout, and feature a roundhouse, back-shop, locomotive servicing facility, and a few small sidings. It's set in the 1890s on the Western & Atlantic in Marceline, home of Lady and the Tramp. The style, color pallet, and general atmosphere is intended to replicate the classic Disney film in model form.
While L&TT might be the hinge-pin that the theme revolves around, other films and inspirations will likewise also find their way home.

Bench-work started at the very end of 2018, and as of this writing, is finished to a foam tabletop. I plan to build my layout as a modeler set up, and build outward as time, money, and space allows. My goal is to have a railroad that I will never need to tare down, only modify and bring with me as my life grows.

Hopefully, this blend of modelling, fanart, and alternative history will entertain you as much as it's going to entertain me.

At this point, all I can say is....It Begins