Sunday, May 5, 2019

Progress Report 2

The new switch and turntable lead are just about finished. Once again, a big thank you to Tyler for his hard work in getting the track-work perfect. This man is incredible and his attention to detail and desire to get things absolutely right in astounding. Right down to the point where, when just about finished with one of the switches. He looks at it, and goes "I think the ties could be made better."...and the rips the whole thing out and starts again. Along with the new turntable lead and the new switch, work continues on laying the two shop tracks, as well as the roundhouse wing tracks. We've been using a product Tyler had on hand called Age-it-Easy-Brown to stain the ties black. India ink and dye could work. One just has to be sure that it is not waterproof otherwise it will mix with the tie paint.

Before this project, I sort of always looked at hand-laying track as one of the more complex processes of model railroading. Once a modeler moves beyond the "it's a model railroad and I don't care about anything but trains running in circles" level, track becomes a model. Not talking about "Rivet Counting" but just trying to convey more of a depiction of a railroad over a train set. Compromise always is necessary because of the available resources, and the effect of scale.

The usual method that we have landed upon is to use a small pair of pliers and Micro Engineering Company medium spikes. Tyler owns a Micro-mark spiker that has a cutting head designed for the head of the spike to slip into a "T" shaped slot. I always tend to lose a few spikes here and there, but he's a human spike laying machine. We try to spike every 5th or 6th tie on both rails when doing hand laid track. More around switches and on curves. Between the two of us, we have a bunch of track gauges acquired over the years but an NMRA gauge is used as a final check. 


Track built on an old diorama. Hopefully, the end product will look similar.

Pro Tip: Run a bead of glue along the underside of the first rail with a toothpick and then lay it in place. Put in a few spikes along its length. On straight track, use a metal ruler to keep the rail positioned on the ties where you want it. Once in place, slowly run a soldering iron along the top of the rail to quickly set the glue. If you have too much glue on the rail you can use acetone to thin it. I'm told nail polish remover will also work. We haven't tried that.


At this point, over 80% of the track work for Marceline shops is done. With the final tasks being the roundhouse tracks, and the turntable whiskers. The turntable continues to be a source of annoyance, with the motor idea being cast completely out the window. For the moment, the turntable will be turned by hand, but if this means a hand-crank or just reaching in with a finger and spinning it "Armstrong" style has yet to be determined. 

Another ProTip: Keep a magnet nearby. You can sweep it along the track to pick up any loose spikes or filing shavings.

                        **********

Other projects are moving along briskly. For the ashpit, a hoist and working deck were constructed from basswood left over from other projects. Inside the pit will be two iron boxes. Once full of ash, these can be hoisted up, and a gondola slid underneath them for disposal.


Once complete, the model was painted "dark camouflage brown" from a rattle-can, and then a light dry-brushing of earth brown brought the grain out and highlighted detail on the crane and deck. 

Dumping the fire and cleaning out the ashpan will be one of the many tasks to be preformed at Marceline shops, as will removing ash from the pit. Modeling a locomotive service facility gives the chance to emulate things not normally seen on a model railroad. Eventually I would like to add a small smoke generator to the ashpit to full it with smoke as a fire gets "dumped". 

Wednesday, April 17, 2019

The Dispatch and the Texas

One of the more reliable locomotives in my small but mighty fleet is the #97, "Dispatch", and the #49, the Texas.  

The Dispatch and Texas are based on a historical locomotives, both built in October of 1856 by Danforth, Cooke & Co. Dispatch was built right after the more notable Texas, and would share a C/N that is numerically after Texas's.  Texas wore the road number 49, while the Dispatch was allocated the number 50 for most of her life.
The Texas, at the end of her life. Atlanta, 1900

As both the Texas and Dispatch could be considered sister locomotives, the respective models were built with an eye to keeping a family resemblance. The Cooke Locomotive and Machine Works, which was located in Paterson, New Jersey, manufactured locomotives from 1852 until it was merged with seven other manufacturers to form the American Locomotive Company, otherwise known as ALCO in 1901. ALCO continued building new locomotives at the Cooke plant until 1926.

The Dispatch vanishes from the record around 1880, and her fate in unknown. More then likely, she was disposed of as scrap as locomotive technology advanced and made her obsolete. The Texas, survived well into the 1900s, being renamed the "Cincinnati" in 1881, and renumbered 12, and then 212 by the NC&StL, before being finally stricken from the roster in 1908.


The Dispatch on the bridge over the old Pot Canal diorama
In my augmented history, the W&ARR&Nav Co, as the lessee of the state property, found itself the owners of a large number of older power and equipment in need of disposal, updating, or to be supplemented with more modern power. Part of the lease agreement stated that disposal of state owned property would have to be delegated by the railroad's board and the state, and the property replaced in kind. This left the new company with a few options, rapidly replace older power at cost owed to the state, or upgrade the current fleet.

Rather then dispose, the W&A went though an extensive rebuilding program. Conversions to coal, air compressors and brakes, injectors, and other modern appliances found themselves being hung on Civil War era frames. Locomotives like the Texas, Dispatch, and General found themselves standing toe-to-toe with modern counterparts. Their service lives greatly extended.

Part of this scheme involved a new numbering system. Emerging from the shops in 1890, the Dispatch, with airbakes, injectors, and coal grates in her firebox, found a new number on her smokebox: #97.


**********************

As put by the eloquent John Ott; before the Victorians sobered up in the mid-to-late 1870s, locomotives were extravagant works of mechanical art with bright metals, polished woods, and colorful paint. 

No two locomotives were alike, even ones from the same builder. They were gleaming Victorian jewels of Russia Iron, paint, gilt, copper, paint, brass and polished steel. Their wooden cabs were crafted as fine as furniture, and stained and painted with pride. Most had names instead of numbers. Their crews, who often found themselves assigned a locomotive for lengthy periods of time, were proud of their machines and polished and cleaned them daily. Some even dipped into their own pay to obtain real gold leaf paint for numbers and names. 


Sadly, historical sources for old locomotive paint, colors, and decoration schemes have been scattered among out-of-print books and hard-to-find websites, and muddled by the likes of Hollywood and public misconception.

Building my models of the Dispatch and the Texas began with the Bachmann New Tool. Now, I've had experience with multiple models from the Mantua General, to the IHC 4-4-0. While I do intend to write up my experiences with each, I'll leave that for another day. For now, I will say that the Bachmann NT is a god-gift to those of us who model pre-1900.  

The original Bachmann HO Old Time 4-4-0 has been around for a long time, and was at one point the very bottom of the barrel when it came to 4-4-0 models in HO scale. With it's motor in the tender, poor pickups, thick and clunky molding, and out of scale proportions, it was hideous to look at and ran with all the grace of a beached whale. Then, the NT's hit the marked. The upgraded models had sharper tooling, better power pickup, crisper paint and detailing, and finally...the motor...WAS IN THE BOILER! Then, to add to the joy, the model came with DCC and sound right out of the box. 

The Texas, fresh from her 1890 rebuild.
First announced in 2014, the first batch had problems with quartering...well, damn. The next batch ran great and the sound was good, Hoorah! Strait out of the box, these locomotives were a reliable canvas for which to paint and detail, and there are a lot of neat creations already out there. 

The Dispatch started life as a stock YORK model. The Texas, as a stock TEXAS. Both underwent similar rebuilds. I cut off the stack and pilot beam, not being a fan of the front coupler and coupler-box that B-mann uses (It sticks out like a tumor). The new pilot is a brass horizontal iron strap pilot, as preferred by the W&A RR in the pre-1870. By the 1890s, these pilots had fallen by the wayside, and the more traditional vertical wooden slat pilots were far more common. However, I like the strap iron pilot, and I have a few locomotives with the wooden slat pilots representing that era on the W&A.

I swapped cabs and tenders with a donor “TEXAS” model, and re-lettered them. The Bachmann TEXAS is a very close representative to the Wilber Kurtz paint scheme as seen on the prototype prior to it's 2017 restoration. For the cab and tender, I spray all surfaces with Tester's Dullcoat to cut down on the plastic shine.
Drawing by Jon Davis


Wilbur Kurtz collected an incredible amount of information on locomotive paint, patterns, and colors on the W&A RR. By the 1890s, most of the locomotives had gone from vivid colors to the dark blacks that started to eek into the industry as the practice of burning coal became more and more notable on the earlier bright pigments. However, given that my locomotives are fictional hypothetical rebuilds, I decided to reach back in time and do a blend of historical colors, and modern updates. My scheme for this two locomotives is based on the 1931 restoration of the Texas, and Kurtz's notes. The latter can be found at the Atlanta History Center, as can the former. Beautifully restored to her actual 1890s paint scheme.

Russian Iron, as seen on the Texas. 
The boiler, like all of my W&A Locos, got a coat of dark Russian iron blue. This is a very popular topic and I'll add my penny farthing to it. In my experience playing around with paints, and paint combinations, and having seen many samples of Russia iron from different sources. I tend to lean towards a dark charcoal color, as this seems to be the most typical for the era. I strongly recommend Model Master's "Gunmetal". It has an excellent color and creates a beautiful and accurate effect.
It should not have any overt blue, or absolute silver. Many otherwise excellent models have been done dirty by sky blue jackets or bright silver boilers. For more information on Russian Iron, there is a superb article by the PacificNG.com group. 

The cab roofs are the only part of the locomotive that I weather, as a rule of thumb. As this is the only part of the locomotives that the crew don't regularly get too. I usually do a very light dusting of black pastel powder up here. Then seal with dullcoat.
Texas, with her entrails hanging out.

The instillation of the decoder, keep alive, and speaker required the tender deck to be cut into, in order to make room. The original molded on wood-load was carefully cut out with the use of an X-acto. Then, once the electric components where jammed in, a "pyramid" was built over the top. The Dispatch is DCC equipped and has the standard sound system as supplied by Bachmann. Soon to be replaced by a Loksound ESU 4.0 Texas is also DCC equipped with the Loksound ESU 4.0. But her instillation software and the changes made to it are a whole other story.

 The coal loads where made from crushed coal. Made in a very sophisticated and delicate manner that involves a plastic bag, and a hammer. The top of the cover for the DCC equipment is painted black, and a layer of Mod-Podge glue to painted over with a Q-tip. I prefer to use Mod-Podge matte, as not only does it dry completely clear, but it leaves a nice flat finish. Coal is sprinkled on at select sizes and layers until enough is in place to give it a "just right" look. The W&A RR has converted fully to coal burning, and not only is coal found in it's locomotives, but has become a source of income as it's shipped south to the industrial heart of Atlanta, and run as bridge traffic over the line south from Chattanooga, from the Tennessee Coal, Coke, & iron Co. Located in Dunlap TN. 

Other details added to the locomotive include additional piping made from brass wire, single phase air-compressors from Keystone, new check valves, and a cross-head pump for the Texas. The Dispatch is equipped with injectors on both engineer and fireman's side. The Texas has a cross-head pump on the engineer's side, and an injector on the fireman's. Air hoses can be found on both locomotive's tenders, and the Dispatch has a set of switchman's steps on the back of her's. 

Texas also received a small personal touch in the form of a set of 43 Star US Flags on each of the headlamp candlesticks.  


Texas was given back her original number of 49. I'm not sure if the Dispatch was numbered after the 97 of folklore, or just happenstance. The truth is probably somewhere in-between. It's not that I'm unaware that the real locomotive had the number 50. It's just that I like the number 97, and it helps to represent the growth of the fleet as time marched on. Jackson McQuigg, vice president for the Atlanta History Center, has emphasized how much of the actual Texas had been modified or changed out during its half century of service. He notes the discovery of an 1871 stamp on the boiler as an example of this, and parts of the motion such as the crosshead and sidebars have stamps dating to the 1880s in them. So, my models, like my railroad, are rather a continuation of the evolution, rather then a historical representation of it. 


Dispatch and Texas, showing off their family similarities

Saturday, April 13, 2019

Progress Report

Trying to get into the swing of things. In a perfect world, I'll update this blog at least once a month. Let's see how well that lasts! 

Going forward, I made a slight change in the track plan. Moving one of the service tracks in order to allow better access from both the mainline, and eliminate that wonky curve. Originally, I wanted the mainline and the service track to be separated by the water tank, sand-house, and coal-stage. This required the service track to curve around the structures so that it can link back up with the main on the other side. As we laid down the center-line for this track and started putting ties down, the further along we got, to more out of place it seemed.


After a quick rethink, I landed upon this track plan. With the service track and main both on the same side of the structures. This gives us a little more room for the structures, and actually breaks up the lines of the layout slightly, so that there isn't just this glob of tracks running both to the service facility, and the back-shop.


This will require the removal of the Wye switch (Which we just got working) and the placement of a new switch off the mainline. Thankfully, we didn't have to pull up too much track, and the new switch went in rather quickly. A big thank you goes out to my fellow modeler, Mr. Tyler Rogers, for his work in the track department. His talent for track laying is without equal.

Ultimately, there will be some expansion off this module, and more then likely it will be to the right. The track that comes off the turntable and runs alongside the roundhouse is not just a whisker track, but will run alongside the main, through a double crossover, and become the lead to the yard I hope to build in the future. This will allow the yard to be switched, and locomotives to move from the yard to the roundhouse and vice-versa without ever fouling the main.

Marceline's location on the fictional W&A RR would land it somewhere between the real world towns of Resaca and Tilton, with the next big yard being located at the equally fictional town of Curtis Switch.

                               ****************


All Aboard!

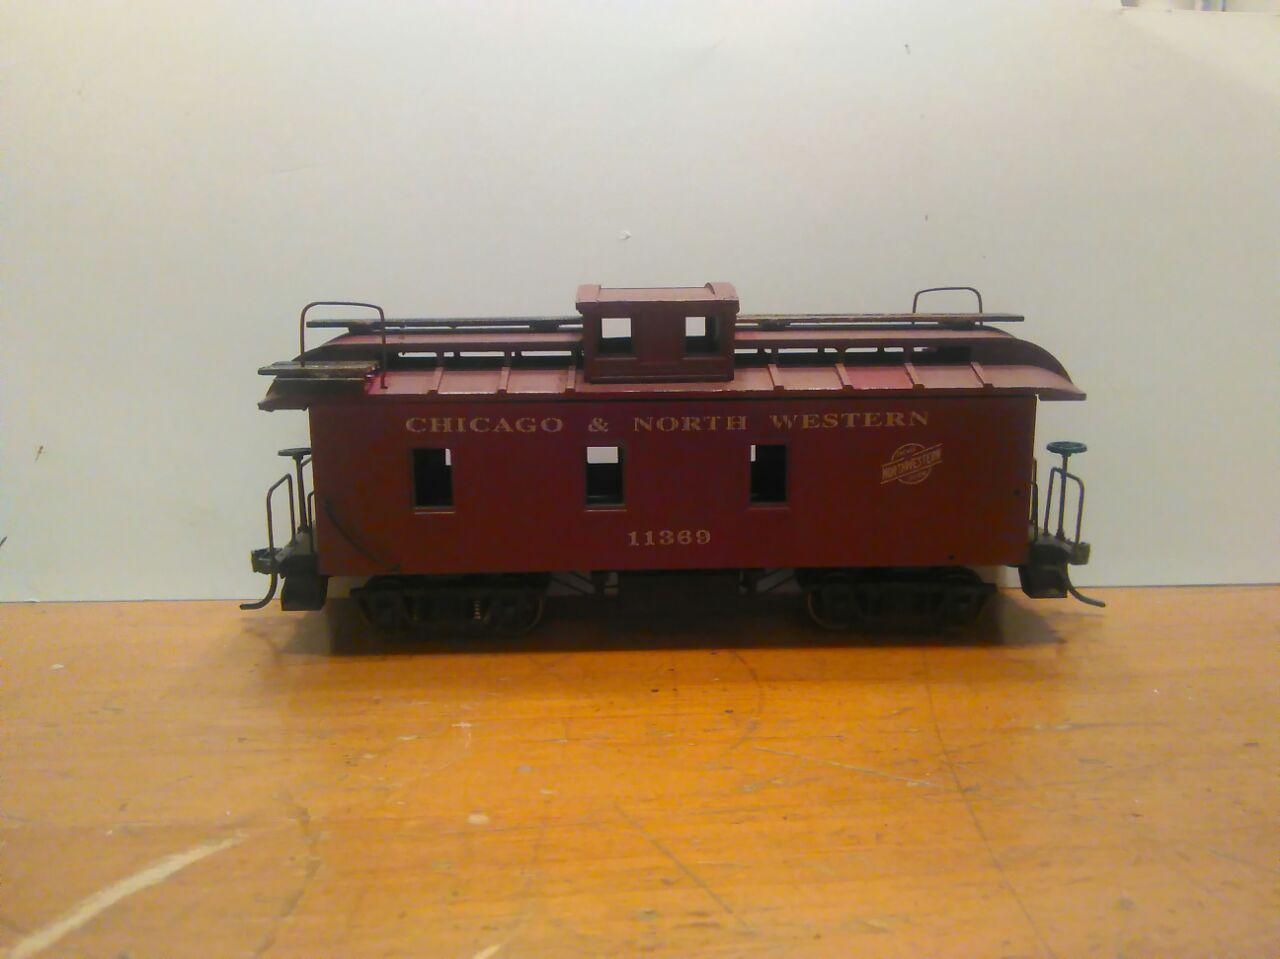
Another side project I started was the construction of a new caboose. I'll make it no secret that cabooses are my favorite piece of non-revenue equipment. I spent a lot of my childhood, and my years right out of high-school working aboard cabooses, and even today there's two that I deal with day-to-day at my current job.


For this project, I wanted something a bit different. Cabooses at the turn of the 19th century were the home away from home as well as the rolling office for the train crew. The conductor kept records and handled business from a table or desk in the caboose. The crew could exit the train for switching or to protect the rear of the train when stopped. They could inspect the train for problems such as shifting loads, broken or dragging equipment, and hot boxes (overheated axle bearings, a serious fire and derailment threat).

For longer trips, the caboose provided minimal living quarters, and was frequently personalized and decorated with pictures and posters.

I wanted a neat caboose that eked character, but also was capable of having it's roof plucked off in order to have a detailed interior. I have a personal rule about detailed interiors. Unless it can be seen fully, there is no point to them. Usually, I do "shadow boxes" in my structures and rail-cars. Just black outlines and forms to suggest an interior without going to extreme lengths. With this car, I wanted to do a full interior, and thus, it had to be accessible.

I started out with a Roundhouse Caboose kit. These cars are very nicely molded, and make great starts for kit-bashing. I wanted to have a clerestory in this car, and I drummed up a spare MDC Overton roof. (Finally, something useful from an Overton. I'll make it no secret that I find the Overton to be the most useless piece of HO scale equipment ever. But...another time.) After cutting in a space for the kit's cupola, I fit all the bits together and sat back. Looking nice.

The original trucks got replaced with passenger car trucks from the Overton, and the roof got some detailing in the form of some panel struts. With the basic structure complete, it was time to focus on the interior. I wanted to base the inside on a caboose I spent a lot of my teen-age time aboard, and while it's a more modern car, the basic style and amenities translated well to a 19th century look-alike. The floor was made from basswood scribed with "planks", and stained with a black wash.The majority of the car was going to be painted an off-gray, but the floor was going to be left as bare planks.

Using a Micro-mark chop-it, I cut the panels, struts, and sides for the cupola seats from strip-wood and basswood. The seats themselves were made from the same scribed wood as the floor. I know, some folks might question why the cupola dosn't have "seats", however the prototype car likewise didn't have true seats. Rather, just a set of long benches, without padding. I imagine this made for a rather hard ride. Ladders up into the cupola were made from plastic leftovers from the original kit.

The desk was made the same way, and a few panels to represent the bathroom, pantry, and storage cabinet went into place. A single bunk was installed, and the whole thing painted. One must assume that with one bunk, "warm bunk" rules were in place, where someone was awake at all times.


Returning to the roof, I started work on a set of running-boards that would run the length of the clerestory, as well as a set of hand-railings. These where made board-by-board, with the wood handcut via the Chop-it. (I can not recommend a Chop-It more. I use bass and balsa wood a lot in my builds, and this tool gets used a lot.)

The handrailings were made from wire, with holes drilled with a pin-vise. Once the wood was in place, it was time for the first coat of paint, and stain.

I've had a love-hate with wood stain. I know some modelers have had a lot of luck with the stuff, but I've never had a knack for it. Preferring to use washes rather then full on stains. With this model, I decided to do an experiment. One of my fellow modelers has used a "stain pen" on some of his models, and to great effect. I found the same pen at Wall-Mart, and figured this was as good a chance as any to give it a shot. For whatever reason, it had a nasty reaction to the wood, and instead of being a nice stain, it rose to the surface as a thick sticky mess.


Uh Oh.


I ended up letting it dry fully, then sanding it down to try and control the thickness. After a few times sanding, it was looking no better. So, in the end, the same paint used on the car sides ended up going down over the running boards. I did a light dry-brushing over the boards once the paint had dried to help them stand out. The end result wasn't bad, so I moved on.

With the interior more or less complete, it was dropped into the car, and the inside of the car was given a nice coat of gray. I need to find a potbelly coal stove, and a few other small details, and then the interior will be finished. I also need to work on glass in the windows.

So far, I'm really pleased with this car. It's painted in "oxide red" with "cream" doors, which the scheme I use for my W&A RR's hacks. Historical records (as of this writing, I'm still searching) seem sparse as to what the W&A had on it's cabooses. One has to imagine the traditional red with perhaps white lettering. I have thought of their cabooses perhaps being painted the same as early passenger cars, which was a yellow with red lettering and trim. Perhaps this car could be an experiment for this.


Perhaps...


Monday, April 1, 2019

The Turntable

The turntable was a common, but very important, device that could be found in most terminals, large and small, during the steam era. These would often be found set up alongside roundhouses in order to facilitate movement into and out of the semicircular building in order to store steam locomotives and perform light maintenance on railroad equipment. During this time steam locomotives were operated most efficiently in the forward direction and thus had to be turned every time if, for instance, they were to make a return trip (or for a myriad of other reasons). In many cases a turntable was more practical to build than a wye, which took up much more ground.

Sellers Iron Turntable
Turntable where relatively simple pieces of infrastructure. A large, circular five to ten foot pit was dug out in which a standard span was placed (not unlike a bridge span). Around the edges of the pit a rail was placed and the support span usually had wheels attached to it at either end in which to track along it. This rail really was only there to help support either end while equipment was moved on or off. Also, at the center of the pit the span was placed on some type of central anchor hinge. Finally, in later years as the structure became somewhat more sophisticated a small operators shack could be found on one end where a worker would be located to operate the device.

The turntable at Marceline is one of the centerpieces for the layout, and will add greatly to the operational play-ability of the model. Not surprisingly, early turntables were very small, sometimes just 30 feet in circumference since nothing larger was needed with the relatively small locomotives and cars in use during much of the 19th century. The Atlas hand powered turntable seemed to fit this bill perfectly, and seeing as I already had one on hand, well...away we went.

The turntable pit was carved out of the inch thick foam, down to the wooden bench-work. To make this easier, the pit was placed on a point where two pieces of foam met. That way, all that had to be done was two half circles carved out of the ends of each piece, rather then carving a full circle in the center of one piece. The pit was lined with strips of bass wood to bring the turntable deck to the correct height, and then the modified Atlas turntable was dropped in.


The original plan was to take my modified Atlas Turntable, and place a motor underneath it from an old disused locomotive. However, we kept encountering problems with gear ratios. Either the turntable went too fast, or there just wasn't enough power to spin the table. 

I had settled on an early design known as the "Armstrong" turntable as my prototype. It gain this name due to the fact that they required a worker manually pushing the device in one direction or the other. I had played around with making the turntable a Sellers style iron turntable, which was popular in eastern regions. But I've always been a fan of the wooden gallows style. An example of the gallows turntable can be found at the Nevada State Railroad Museum where they use it to turn respective 19th century locomotives.


Current Track Plan


The jury is still out on that for the moment. For now, there is still much tinkering to be done.  


Monday, March 25, 2019

Rails and Ties

Work continues on Marceline Shops. More track is being laid and we tackled the lead to the turntable, turntable pit, and the turntable crank and equipment. The turntable to reached off the lead track via what turned into a "wye" stub switch. Most of the switches around the roundhouse and yard in Marceline are planed to be stubs.

Stub switches where very common prior to 1870. Rather then the conventional set of tapered point blade, on a stub switch both the movable rails and the ends of the rails of the diverging routes have their ends cut off square. The rails leading up to a stub switch are not secured to the cross-ties for several feet, and the switch mechanism aligns the movable rails with the rails of one of the diverging routes. This is the part that actually moves, and the source of the slang "bend the iron" for throwing a switch, because you literally are bending the iron. Stub switches were more common in the very early days of railroads and could be found in 19th century yards and branch-lines.


Easy to lay and easy to operate, their disadvantage comes in that rail alignment across the gap is not positively enforced and they require some substantial flexibility in the rails (meaning lighter rails), or an extra joint at which they hinge. Therefore, these switches cannot be traversed at high speed or by heavy traffic and so are not suitable for main line use. A further disadvantage is that a stub switch being approached from the diverging route that is not connected by the points would result in a derailment. Stub switches are also almost impossible to throw in hot weather, when the rails expand and press against each other. It also doesn't take much in the way of misadjustment to put the whole train on the ground.

One advantage to stub switches is that they work better in the snow and ice. The sideways action of the point rails pushes snow to the side, instead of packing the snow between the points and the rail in a more modern design. They are also less prone to operator error than bladed switches, especially in more complex arrangements such as double slip and crossovers, in the sense that the routing was more obvious just by looking at the rails.

Ties, weathered and in place.
Construction of the switch is pretty strait forward. The track center-line is first established. Both main lead, and diverging. The ties are then cut to length and laid out by hand and measured by eye. Like the rest of the track-work, once the ties are in place, they are weathered using Micro-mark's Age-It.

The rail is cut using a Dremel cutting wheel. The best way to establish the geometry when hand-laying, is to lay the common rail first. We chose the right side common rail, as this was the main lead, while the left was to be the turntable lead. We didn't worry about the switch stubs just yet. Preferring to get the rails in place first. Once the common rail was laid down, the other rails could be gauged appropriately against it. The frog was made simply by cutting the rails and filing them down to points. Once spiked together, the points where soldered into one rail. Using the cutting wheel, the frog was isolated for electrical conductivity.

Almost ready for the stubs to be cut.
The final step, once all the rails where in place, was to cut the stub rails free. The ends of the solid rails where then soldered in place, and the stubs soldered to their throw-bar. A switchstand is then linked up to the throw-bar and anchored to the headblock tie. (The headblocks are the extra long ties that the very end of the movable points, be they stubs or blades, rest on. They also support the switchstand.) 

The switchstands I plan to use are all uprights with tall targets. The prototype for these are operated with a handle that is raised, moved, and dropped into a slot. The lever handle is slotted, and when the switch is set for either track, the slot fits over a staple projecting above the lever far enough to receive a padlock which locks the switch. Switchstands are Caboose Hobby up-rights. While they might be a bit over-scale, I've always had a love for switches that had working stands. It just feels more "railroady" to me to be able to throw a switch using the stand-lever. Over the course of my own railroading career, I've thrown countless, countless, switches of this sort. As well as the more ubiquitous ground throw with the weighted arm. But that's another story.


The next stage was the turntable, and turntable pit. I obtained an Atlas full deck turntable. The turntable, which is run via a handcrank located on the turntable frame, has a geneva movement that index locks table in exact position every time. Originally, I had thought to simply motorize the turntable crank and drop it in as a full-deck. Which, while commonly found in the north, where the full deck made sweeping snow out of a pit much easier, would be slightly out of place on my southern based layout. 

Upon seeing the turntable, some of my friends had other ideas. One of which, suggested that we yank the hand-crank and index system out completely and instead attempt to mount a motor from an MTH locomotive as well as a gearbox under the baseboard and turn the table mechanically. We removed the turntable deck, and mounted it higher in the pit to allow room for the table to turn. A rail and support ties where added in a ring shape in the pit and a hole was cut in the foam to allow the turntable to sit flush with the approach rails. 

One problem we've encountered with this arrangement is that we can't seem to find a rear reduction that will spin the table at a realistic speed. The MTH gearbox seems to want to twirl locomotives like a record player. Some tinkering will have to be done. 


More to come!

Saturday, March 23, 2019

Locomotives Of The W&A


 THE TEXAS


This is my fifth (and hopefully final) incarnation of the W&A RR's #49, the Texas. The champion of the Great Locomotive Chase of 1862. Here, the locomotive sits after a rebuilt in 1889, with the addition of injectors, and an air compressor, but painted in a more subdued version of the chocolate brown paint scheme she wore during the war.

This incarnation is built atop one of the New Tool 4-4-0s produced by Bachmenn. It started out life as a stock “Texas”, the running boards where cut short and the stack and pilot beam where cut off. A brass horizontal strap pilot beam was applied, and a new stack was built from a Mantua “General” with a new cap from the top of a Bachmenn On30 Porter stack. Piping was made out of brass stock, and an air-compressor from Keystone was added to the fireman's side. The Texas is equipped with crosshead pumps on the engineer's side, and an injector on the fireman's. Like most of my 4-4-0s, the Texas is “barefoot”, having air-brakes only on the tender. A new coal load made from crushed coal finished the model. The nameplates are decals applied atop styrine sheet, then cut to size and applied to the boiler.


The locomotive has an advanced logic control that can be manipulated in programming mode to simulate the weight of a train under different conditions. Think of it like a “hyper” momentum. Rather then “dumb” momentum which just acts like a giant resister, the hyper momentum can be controlled via manipulation of the locomotive's controls. IE: applying the brakes on an air-braked train will stop the train faster then just shutting the throttle and letting her coast. You can also manipulate the Johnson bar cut off to both improve performance while running, as well as brake. For example, you can stop the locomotive by closing the throttle, swinging the Johnson bar into reverse, opening the cylinder cocks, and cracking the throttle until there is enough back pressure to bring the locomotive to a stop. All with accompanying sound effects.

The goal was to emulate a 19th century steam locomotive in fine detail. This is not a locomotive for the weak. You're not going to just turn the dial and it goes. Running this locomotive is like running a full size steam locomotive. You actually have to operate it.


THE DISPATCH  

The Dispatch is a locomotive that has been with me in one form or another since I graduated high school. Whenever I doodled a locomotive or write about one, it would inevitably be a 4-4-0 with the number 97. I'm not sure if she was numbered after the 97 of folklore, or just happenstance. The truth is probably somewhere in-between. The Dispatch appeared in a number of fictional stories I wrote, as well as a few online articles.

This incarnation is built atop one of the New Tool 4-4-0s produced by Bachmenn. It started out life as a stock “York”, and is the most stock of the 4-4-0 bashes I have done. I swapped cabs and tenders with a donor “Texas” model, re-lettered her, and cut off the stack and pilot beam.

A brass horizontal strap pilot beam was applied, and a new stack was built from a Mantua “General” with a new cap from the top of a Bachmenn On30 Porter stack. Piping was made out of brass stock, and an air-compressor from Keystone was added to the fireman's side. Like most of my 4-4-0s, the Dispatch is “barefoot”, having air-brakes only on the tender. A new coal load made from crushed coal finished the model. The nameplates are decals applied atop styrine sheet, then cut to size and applied to the boiler.

The locomotive is DCC equipped and has the standard sound system as supplied by Bachmenn. Soon to be replaced by a Loksound ESU 4.0


THE NICOLE WATTERSON 

Everyone should have at least one good switch locomotive. Some old yard goat that's been demoted from mainline service, or a little saddletanker who spends her life in the yard.

The Nicole Watterson is intended to represent an older locomotive that was rebuilt into a yard engine. The model started out life as a Bachmann saddletank 0-6-0. It was stripped to the frame, and only the chassis and the saddetank was retained. She carries a boiler from a New Tool 4-4-0, the stack from the Old Tool 4-4-0 (The one part of the NTs that I dislike is the fact that they went from having a mesh metal screen in the stacks to just a plastic bubble) with domes and detail parts from Keystone.

The cab is an MDC cab, and the bunker was cut from an MDC tender. Piping was made out of brass stock, and an air-compressor from Keystone was added to the fireman's side.

The loco is equipped with a LokSound ESU V0.4 decoder.


THE PALLA 
 
Just put the final touches on this one. Other then the addition of a few small details later on, such as a rack of deer antlers on the lamp, she is more or less finished.


This incarnation is built atop one of the New Tool 4-4-0s produced by Bachmenn. It started out life as a stock “AT&SF loco”. I swapped tender shells with a donor “York” model, re-lettered her, and cut off the stack and old pilot beam. A new pilot beam was built from styrene and balsa wood, with a brass vertical slate pilot attached to the new beam. The domes where replaced with Baldwin domes from a set of spares for the Bachmenn Richmond 4-4-0. New piping made from brass stock, with the new check valves and cross-head pumps obtained from Kemtron. Brake-piping was made out of brass stock, and an air-compressor from Keystone was added to the fireman's side.

The cab was repainted to a color that was more representative of polished wood, and an engineer and fireman figure from P.K.'s 1800's range placed in the cab. A new whistle and new stack and a new coal load made from crushed coal rounded out this build completing the conversion to a coal burner. Like all my 4-4-0's she has a set of switchmen steps on the rear of the tender. The nameplates are decals applied atop styrine sheet, then cut to size and applied to the boiler. Like most of my 4-4-0s, the Palla is “barefoot”, having air-brakes only on the tender.


The locomotive is DCC equipped and has the standard sound system as supplied by Bachmenn, with the “Crosby” whistle activated. 


THE SCAMP

The Scamp was one of my first bashes. Built from a high boiler Bachmann 4-6-0, I wanted a high driver ten wheeler evocative of the mid to late 1890s. The B-mann offering was pretty close, but was a bit too modern. I backdated the locomotive by removing a few appliances such as the dynamo and removing the Walsherts valve gear to make the locomotive have inside Stevenson. I disliked the tender the model came with and unable to find a suitable replacement, I ended up making my own. 
The tender tank is from a tyco 4-6-0, while the frame is one of the smaller tender frames supplied by B-mann.

The locomotive is completed with brass boiler bands, a crisp all black paint scheme, and a switchmen's pilot as she mostly finds herself in priority freight service. A new coal load made from crushed coal finished the model. She carries a Tsunami “Medium steam” sound decoder, and is one of my more reliable runners.